Advanced Mode allows you to install and manage more than one instance of TM1Connect on the same server. This mode also allows you to install and configure multiple web sites, applications and application pools. In addition, if you have Enterprise Services also installed, you can manage and add Server instances of both TM1Connect and Enterprise Services from a single configuration utility.
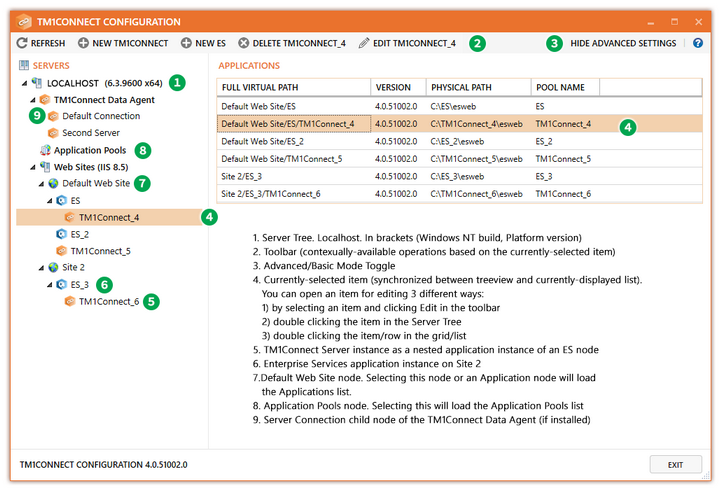
Key to navigating in Advanced Mode is understanding the different node types found in the Server Tree, shown in the user interface below, and the operations available when each different type is selected.
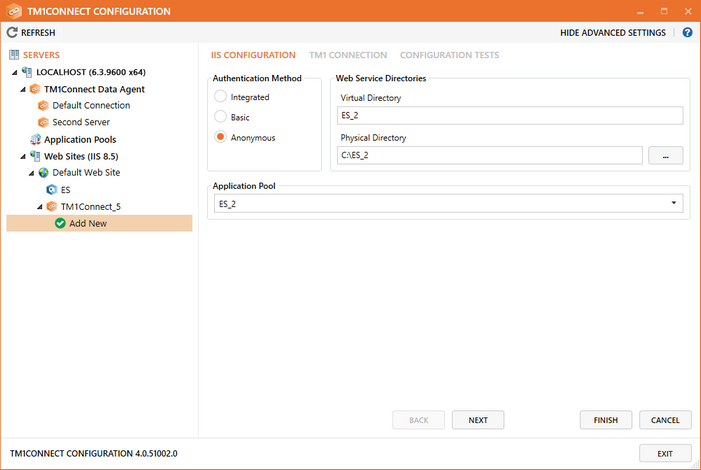
To create an application in Advanced Mode, select either a Web Site or an Application (any application type - ES, TM1Connect, or IIS Application) node in the Server Tree, and from the toolbar, click New TM1Connect (or New ES if you have Enterprise Services also installed.) This will begin creation of a new server application instance. Depending on the type of Application you are creating, the Application editor will open and prepopulate the first tab with an application name unique on the server and the Server Tree will update with an Add New node in the place where the application will be added. An example of this can be seen below:
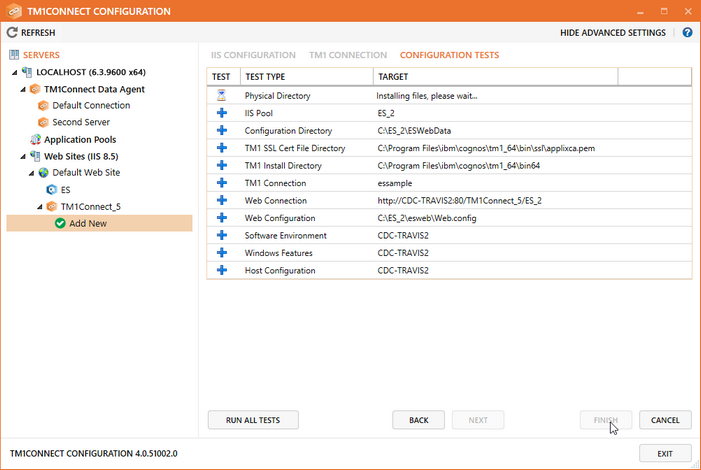
Populating the fields in the IIS and TM1 Connection tabs is the same as it is in Basic Mode (the mode in which the first application was created.) Simply complete your editing, and click Finish to complete the creation. The editor will automatically switch to the Configuration Tests tab and begin installing the Server Application followed by running the verification tests, as shown below:
When the process is complete, the Server Tree will replace the Add New icon/node with the icon of the application type you created. |
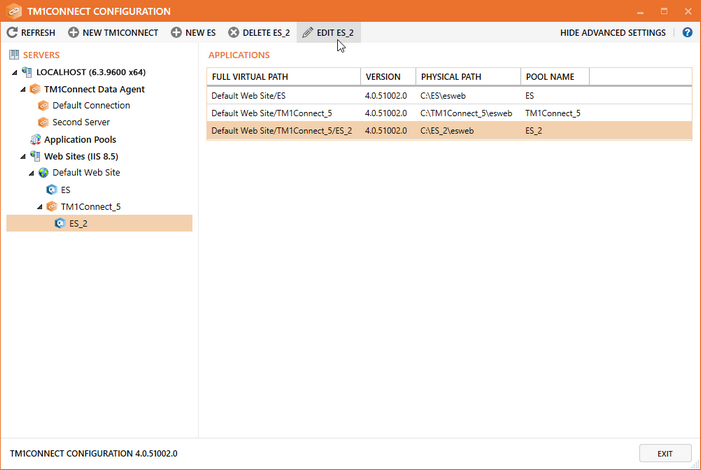
To edit an Application, you can do one of 3 things to open it for editing: 1) double click the Application's node in the Server Tree; 2) Double click the selected row in the Applications list, or 3) Select the item in the tree or list, and click Edit [App Name] from the toolbar, as shown below:
Once you select Edit, the application will open in the Application editor for editing. The process to edit an application is the same as creating a new application, with the exception of the IIS Virtual Directory and IIS Physical Directory, both of which are readonly when you are editing.
When you are done with your edits, click Finish to complete editing, and after the vertification tests have completed, click Close to return to the Applications list. |
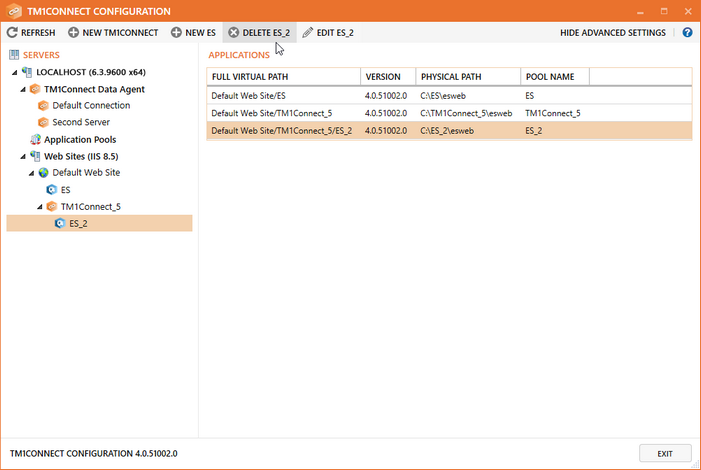
To delete an application, select it in the Server Tree or in the Applications list, and select Delete [App Name]. Use caution as deleting an application will delete any sub-applications in its tree, delete all the physical files from disk, and delete any Application pools not used by any other server applications.
The delete actions, like other delete actions, cannot be undone.
|
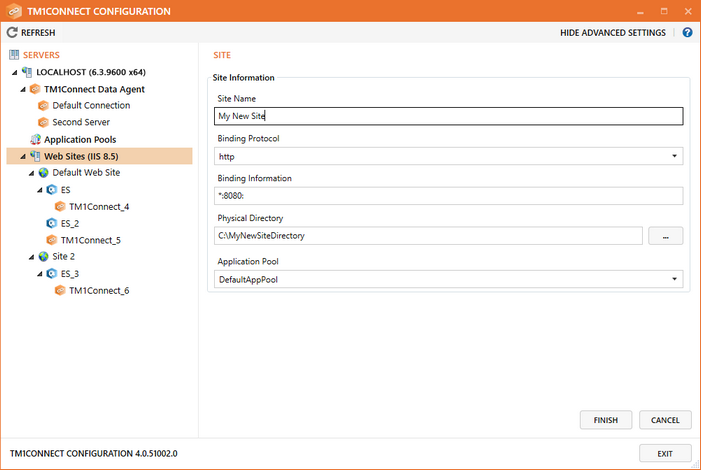
Select the Server Tree's root node or the Web Sites node, and from the toolbar, choose New Site. This will open the Site editor, as shown below: Populate the fields with your desired information, and click Finish to create the site. The editor will close, the Server Tree will update, and you will be redirected back to the Applications list. |
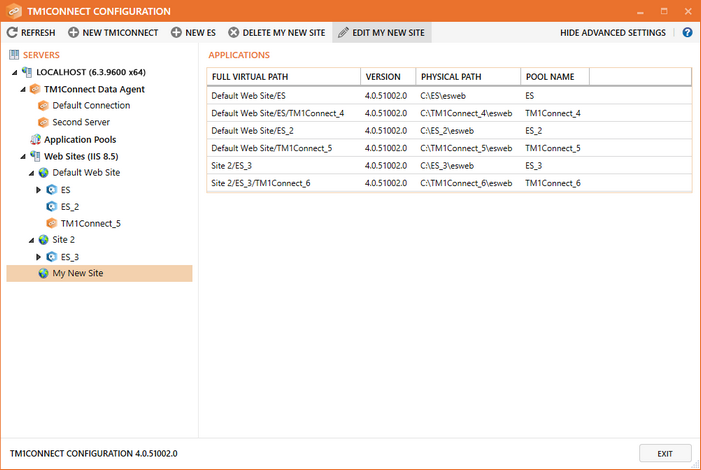
In the Server Tree, select the Site for editing. In the toolbar, click Edit [SiteName] as shown below: After clicking Edit, the Site Editor will open and will be populated with the Site's information. Make any edits (including the Site Name) and click Finish to save the site. Your changes will be saved, the Server Tree will be updated if you renamed the site, and you will be redirected back the Applications list. |
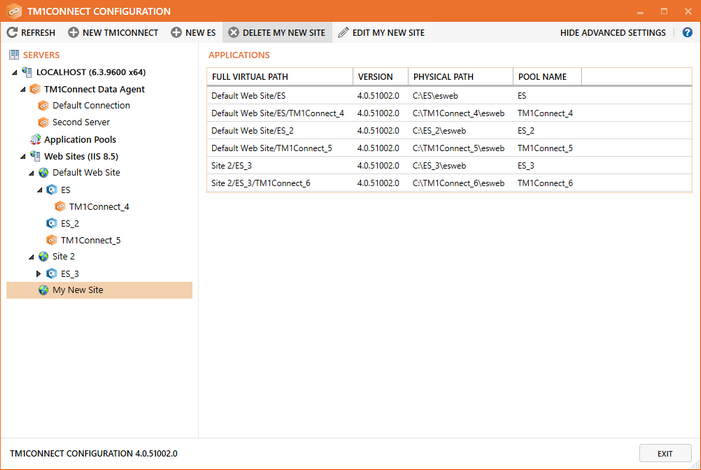
In the Server Tree, select the Site to be deleted. In the toolbar, click Delete [SiteName] as shown below.
|
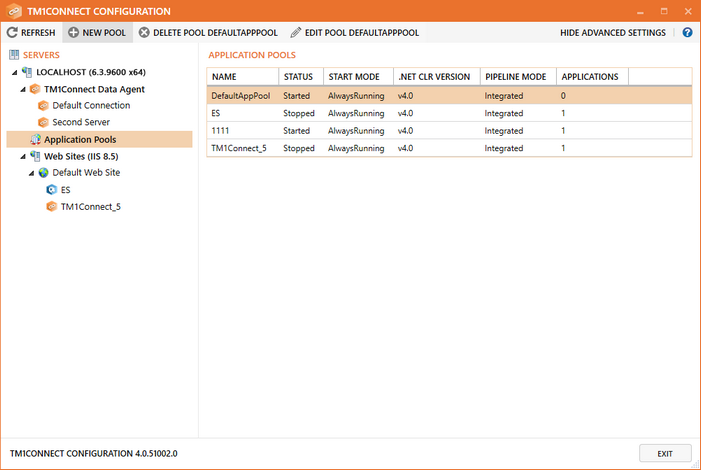
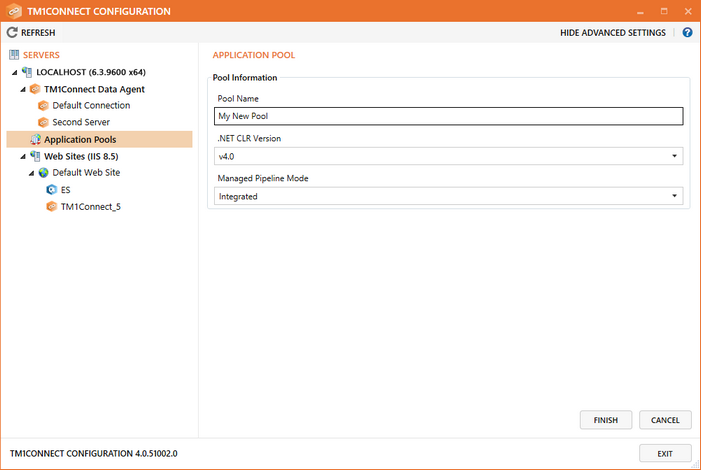
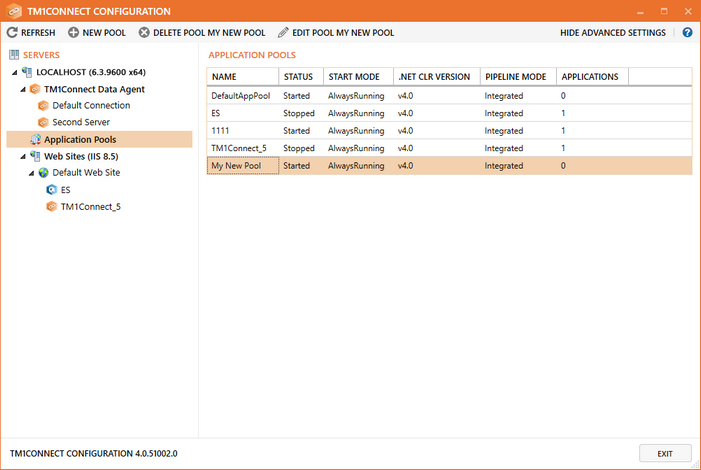
To create an Application Pool, select Application Pools in the Server Tree and select New Pool as shown below: This will open the Application Pool editor. Type your new Pool Name, select any options, and click Finish to save the Pool. After clicking Finish, your Pool will be saved, you will be redirected back to the Application Pools list, and the new pool will be selected by default. |
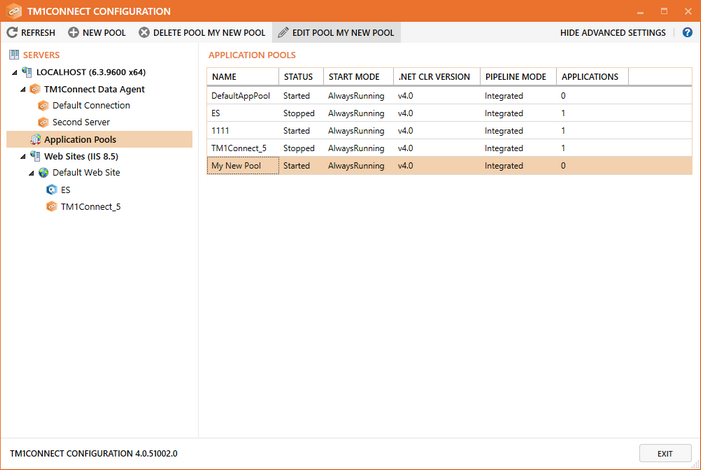
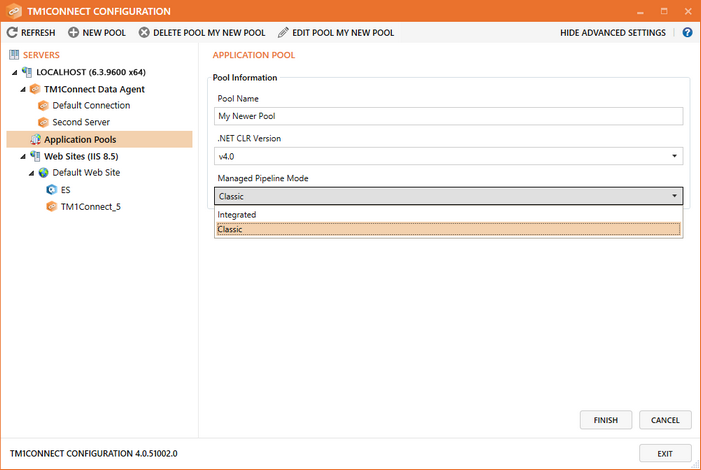
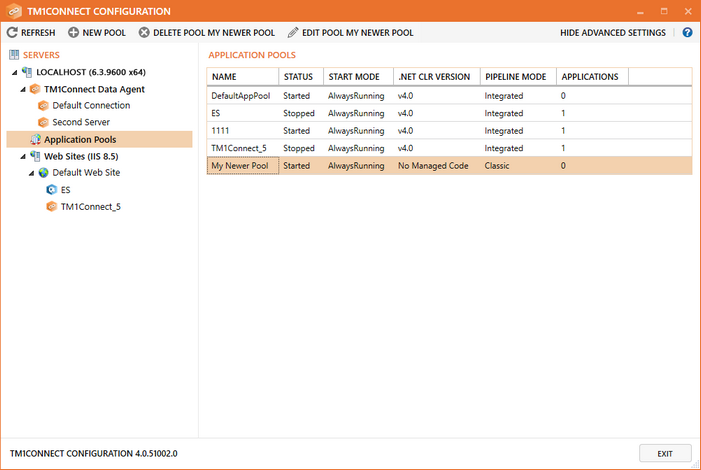
To edit an Application Pool, select it in the Application Pools list and in the toolbar, select Edit [Pool Name] as shown below: This will open the Application Pool editor (shown below) where you can edit the Application Pool's properties. Click Finish to save your changes. After clicking Finish, the Application Pool editor will close and you will be redirected back to the Application Pools list. The updated pool will be selected as shown below: Note how the item's edited properties are automatically updated in the list and how the toolbar buttons have been updated with the new Pool name. It is also helpful to note that you can only edit a Pool's name if it is not in use by any Applications. You can view the number of Applications using any given pool by the rightmost column in the Application Pools list. |
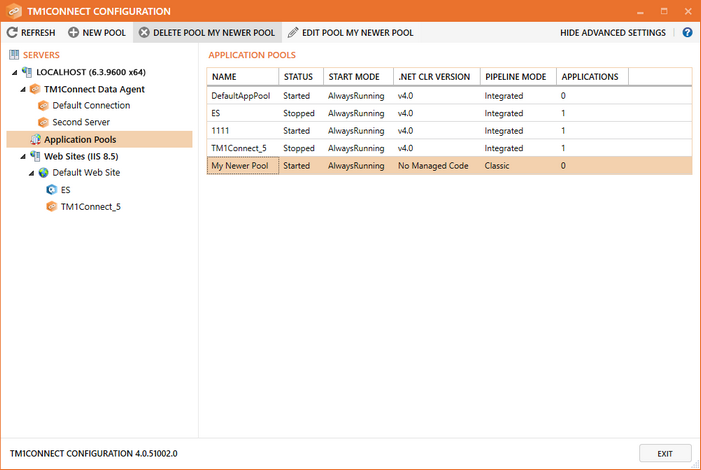
To delete an Application Pool, first select Application Pools in the Server Tree. The Application Pools list will open in the content pane. Select the pool you wish to delete in the list, and click Delete [Pool Name], as shown below.
|
